

Wybierz swoją ścieżkę
Biznes
Osobisty
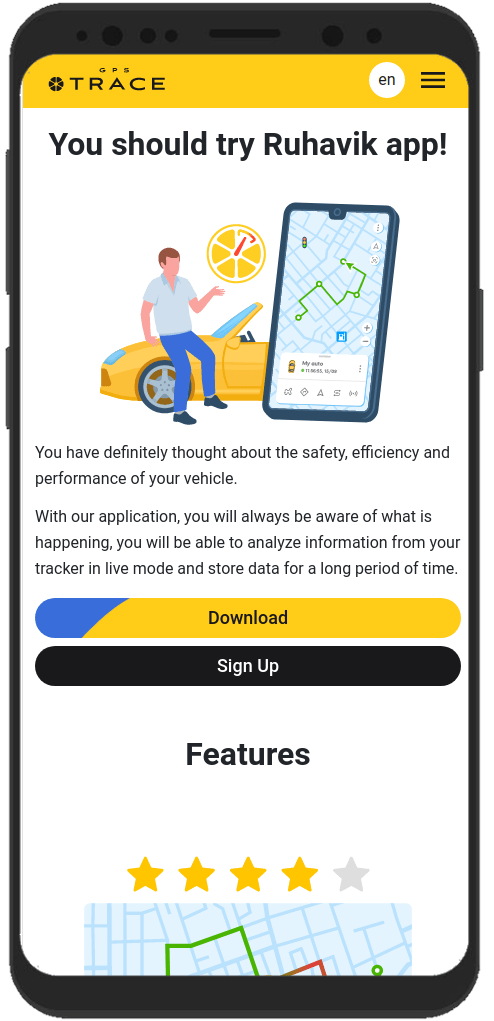
Przewodnik krok po kroku do śledzenia GPS
Chcesz śledzić lokalizację swojego pojazdu lub zwierzaka, ale nie wiesz, jak zacząć? Ten przewodnik przeprowadzi Cię przez podstawowe kroki i pokaże, że to wcale nie jest trudne. Zaczynajmy.
Wybierz i kup odpowiedni tracker GPS
Na stronie urządzenia możesz zobaczyć wspierane urządzenia na platformie i wybrać to, które najlepiej Ci odpowiada.
Na stronie mapy dealerów możesz zobaczyć dealerów, od których możesz zakupić tracker i którzy pomogą Ci korzystać z aplikacji.
Jeśli chcesz, możesz też zakupić tracker w innym, dogodnym dla Ciebie miejscu.
Jeśli już masz tracker, przejdź do kroku 2.
Ważne do wiedzeniaJeśli masz tracker, który nie znajduje się na liście obsługiwanych urządzeń, możesz do nas napisać, a być może będziemy w stanie podłączyć to urządzenie.
Utwórz konto i zaloguj się do aplikacji
Wybierz odpowiednią aplikację śledzącą ze strony rozwiązania. Możesz pobrać żądaną aplikację lub użyć jej wersji internetowej.
Aby rozpocząć korzystanie z platformy GPS-Trace lub którejkolwiek z jej aplikacji, musisz najpierw się zarejestrować.
Aby to zrobić, przejdź do linku lub kliknij przycisk "Zarejestruj się" w prawym górnym rogu.
Możesz również zarejestrować się na stronie jednej z aplikacji lub w samej aplikacji.
Wypełnij formularz i potwierdź swój email, aby zakończyć rejestrację. Proces zajmie nie więcej niż 5 minut.
Teraz możesz zalogować się do aplikacji, używając emaila i hasła, które podałeś podczas rejestracji.
Utwórz jednostkę
Jednostka oznacza to, co chcesz śledzić, na przykład pojazd lub zwierzaka.
Utworzenie jej nie zajmie dużo czasu.
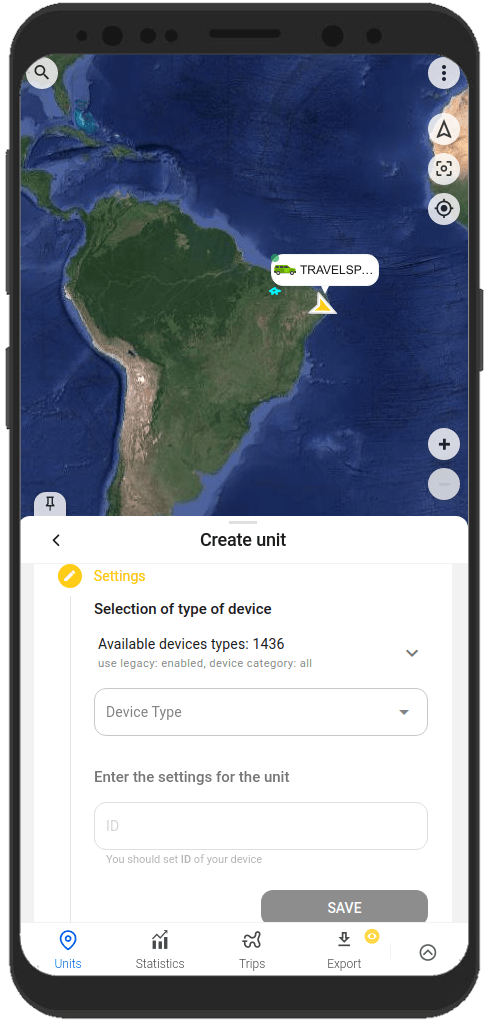
Aby utworzyć jednostkę, kliknij pole wyboru jednostki i wybierz "Utwórz jednostkę".
Otworzy się formularz krok po kroku do tworzenia jednostki:
- Wybierz model swojego urządzenia GPS (trackera) z listy.
- Podaj szczegóły swojego trackera, takie jak jego ID (IMEI) i, jeśli to konieczne, hasło.
- Kliknij przycisk "Zapisz".
Ważne do wiedzeniaJednostka zostanie utworzona z pewnymi domyślnymi cechami, takimi jak nazwa. Możesz je później zmienić w ustawieniach jednostki.
Skonfiguruj tracker
Po utworzeniu jednostki powinieneś podłączyć ją do swojego trackera. W ten sposób tracker będzie mógł przesyłać dane do aplikacji.
Aby to zrobić, skonfiguruj tracker, wykonując następujące czynności:
- Skonfiguruj serwer i port do przesyłania danych
Po utworzeniu jednostki aplikacja pokazuje adres serwera (IP lub DNS) i port, na który powinieneś skierować swój tracker, aby system zaczął odbierać dane, przetwarzać je i wyświetlać w aplikacji. - Ustaw strefę czasową UTC 0
W przypadku większości trackerów, niezależnie od Twojej lokalizacji, ustaw dokładnie strefę czasową UTC 0. W aplikacji Twoja lokalna strefa czasowa jest określana na podstawie danych urządzenia (telefonu lub komputera), na którym jej używasz. - Skonfiguruj APN
Skonfiguruj APN zgodnie z dostawcą karty SIM, której używasz z trackerem. W zależności od dostawcy może to być tylko APN lub również nazwa użytkownika i hasło APN.
Gdy tylko dostosujesz niezbędne ustawienia i Twój tracker zacznie przesyłać dane na skonfigurowany adres serwera i port, możesz od razu zobaczyć go na mapie w aplikacji.

Ważne do wiedzeniaTrackery do przesyłania danych powinny być używane z kartą SIM lub chipem.
Najczęściej przewodnik do konfiguracji trackera jest dostarczany z urządzeniem. Możesz również poprosić o niego sprzedawcę lub producenta swojego trackera GPS.
Tracker jest zazwyczaj konfigurowany za pomocą poleceń SMS określonych w przewodniku trackera. Polecenia są wysyłane na numer karty SIM używanej z trackerem.
Niektóre trackery mogą mieć specjalny program do konfiguracji za pomocą komputera.
Przydatne funkcje aplikacji
Nasze aplikacje pomogą Ci nie tylko śledzić lokalizację jednostki na mapie, ale także zadowolą Cię innymi funkcjami. Pomogą Ci w pełni wykorzystać możliwości Twojego trackera.
Oto niektóre z tych możliwości:
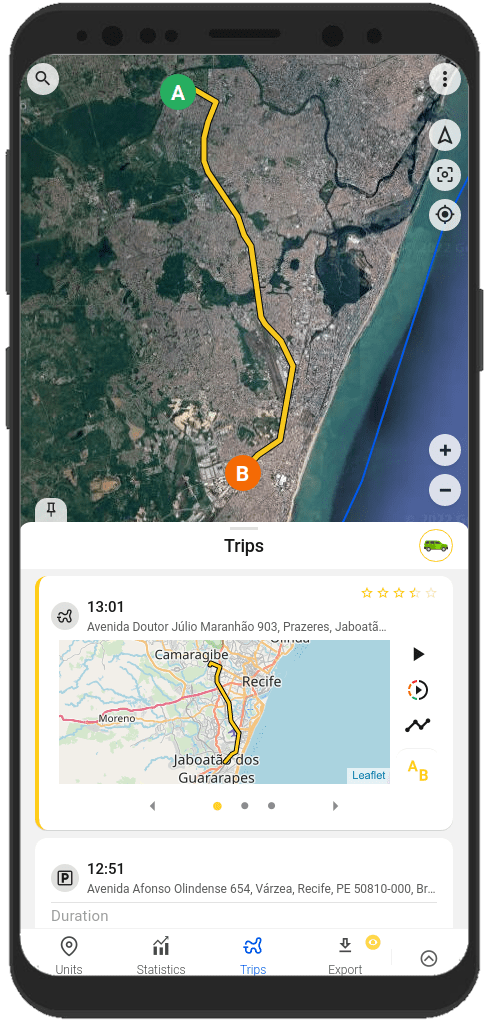
Tworzenie tras i przeglądanie zdarzeń Twojej jednostki
Chcesz wiedzieć, gdzie dokładnie była Twoja jednostka kilka godzin lub dni temu? Wystarczy kilka kliknięć, aby się tego dowiedzieć.
Korzystając z aplikacji, możesz przeglądać szczegółową historię ruchów, śledzić zdarzenia, które miały miejsce z jednostką w ostatnim okresie.
Możesz przeglądać takie informacje na kartach "Podróże" i "Oś czasu" oraz na karcie "Historia" w menu jednostki.
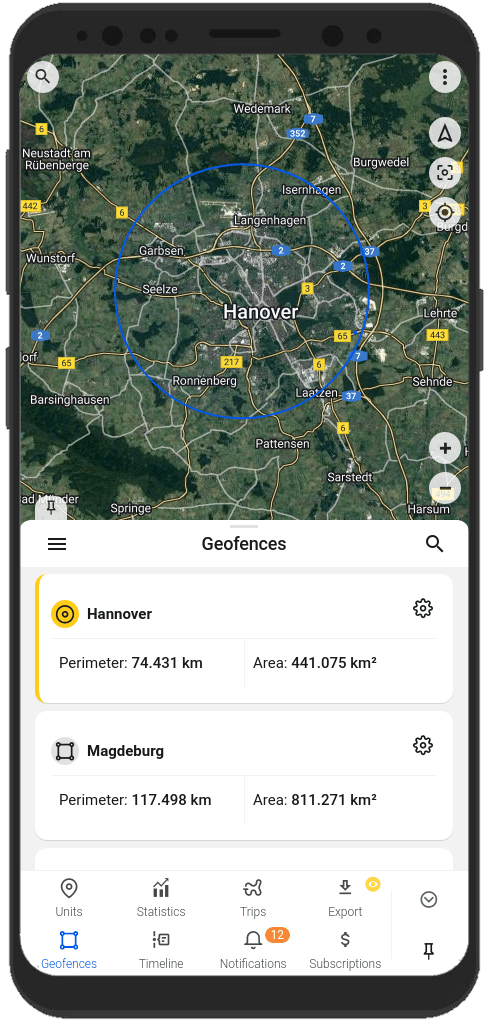
Tworzenie geostref
Geostrefa to obszar zaznaczony na mapie.
Zazwyczaj geostrefy są używane do tworzenia powiadomień, że jednostka znajduje się w określonym obszarze lub go opuściła. Geostrefy pomogą Ci również szybciej poruszać się po mapie.
Możesz tworzyć i edytować geostrefy na karcie "Geostrefy" w aplikacji.
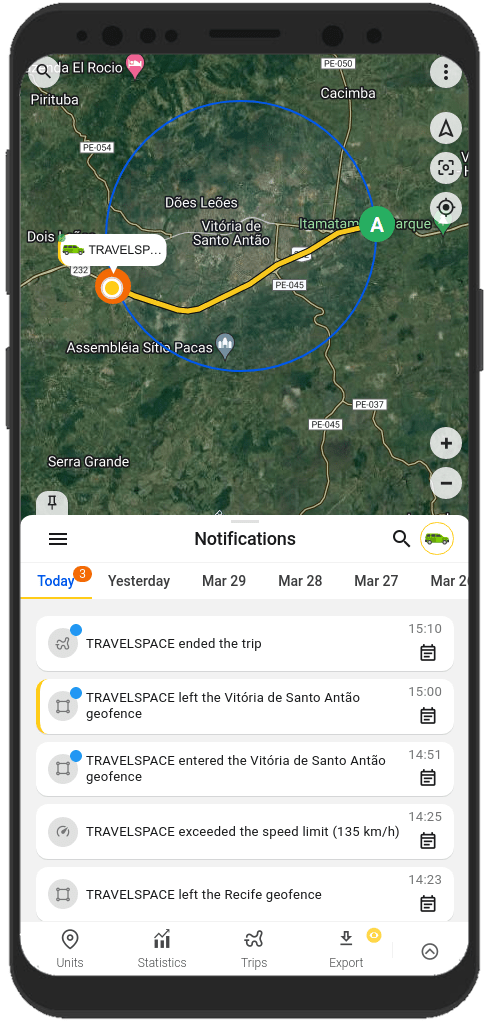
Otrzymywanie powiadomień o stanie jednostki i zdarzeniach związanych z jednostką
Chcesz być zawsze w kontakcie ze swoją jednostką?
Aplikacja Ci w tym pomoże. Otrzymuj powiadomienia w sposób, który Ci najbardziej odpowiada: powiadomienia w aplikacji, powiadomienia push, powiadomienia Telegram i email, powiadomienia webhook.
Zawsze będziesz wiedzieć:
- o wejściu jednostki do geostrefy i jej opuszczeniu;
- o przekroczeniu przez jednostkę określonej prędkości;
- o początku i końcu podróży;
Możesz skonfigurować typy powiadomień i metody ich wysyłania na karcie "Powiadomienia", w ustawieniach powiadomień jednostki lub w menu użytkownika.
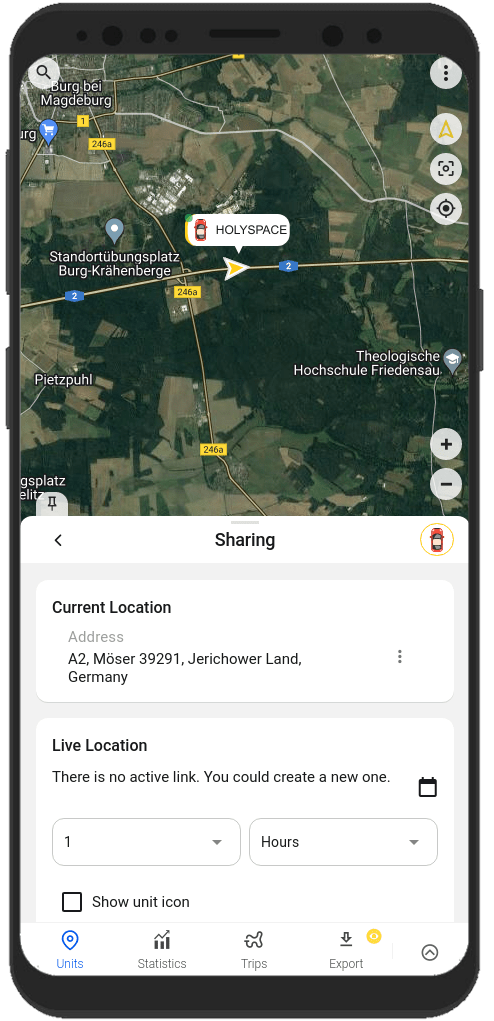
Udostępnianie lokalizacji jednostki innym osobom
Chcesz udostępnić lokalizację pojazdu swojemu koledze?
Nie ma nic prostszego.
W aplikacji możesz wygenerować link prowadzący do lokalizacji Twojej jednostki. Po prostu użyj funkcji "Udostępnianie" z menu jednostki.
Zawsze możesz znaleźć informacje na temat konfiguracji i pracy z funkcjami w naszej dokumentacji pod linkiem
FAQ
To track location, you need:
- A tracker integrated on our platform with a SIM card.
- One of the GPS-Trace solutions: Ruhavik, Petovik, or Forguard.
You can either:
- Use the solution independently by purchasing and setting up the tracker yourself,
or - Contact a dealer for a complete solution, which includes the tracker, setup and installation, SIM card, and other related services.
You can find a dealer near you using the Dealer Map.
More details about getting started.
List of integrated devices.
Please note that this list does not include about 500+ device types from the legacy category.
The full list of integrated devices can be seen in the device type line when creating a unit in the application.
Blog articles:
Discover the Power of GPS Tracking with GPS-Trace: Your Ultimate Guide
In order to see your tracker on the map, you need to:
1. Create an account and log into it.
2. Create a unit.
3. Set up a tracker:
- direct your device to the server and port specified on the Hardware tab in the Unit settings;
- set time zone UTC 0;
- configure the APN (depending on the provider of the SIM cards, this may be just the APN or also the APN username and password).
As soon as the tracker starts sending data to our system, you will see your unit on the map.
More details about registration.
Most trackers are configured using SMS commands that are sent to the SIM card used in the tracker.
The list of SMS commands can be found in the instructions for the tracker. Some devices are configured using special programs - configurators - via a PC.
Instructions for the most popular trackers.
The tracking of one unit (car, motorcycle, bicycle, pet, etc.) is free.
With a paid subscription, up to 30 units can be created in one account.
What you can do:
1. Try to remember if your tracker is used in an account created with another email. To restore access to another account, if you remember this email, you can use the "Forgot password?"
You can also write to us at support@gps-trace.com, specifying the ID/IMEI and type (model) of the tracker, and we will be able to check if the tracker is used in another account.
2. If the tracker is already registered in another account, and you cannot restore access to it, write to us at support@gps-trace.com with the ID / IMEI, type (model) of the tracker and attach a photo of the tracker, we will describe the next steps to solve the problem.
1. To select the most suitable tracker, you can contact one of our dealers. You can find a dealer on the Dealer map.
2. Our website has a list of devices integrated into our platform. To select a suitable tracker, you can use the appropriate hashtags: #vehicle #mobile #common #pet. And also see which trackers are the most popular on our platform in general or in your region.
List of integrated devices.
Please note that this list does not include about 500+ device types from the legacy category.
The full list of integrated devices can be seen in the device type line when creating a unit in the application.
Many trackers have different names but work on the same protocols. Accordingly, when connecting a device that is not in the list of integrated ones, you can try to select another type of device from the integrated ones. In this case, we recommend focusing on the protocol used by the tracker as well as SMS commands that your tracker understands and responds to.
If you are unable to select the type of device yourself, please contact us at support@gps-trace.com and write us your login/email, type, model, tracker manufacturer, and attach a photo of the tracker, instructions for it and a screenshot of the device configuration (SMS commands and device's answers), we will try to help you.
Blog articles:
Connecting Clones and Non-Integrated GPS Devices: Practical Tips
You can turn a mobile phone into a tracker using specialized applications.
We suggest using WiaTag or Traccar Client applications for this purpose.
Blog articles:
1. Using a Mobile Phone for Tracking with Ruhavik
2. How to use your phone as a tracker. Ruhavik & Traccar Client
3. How to use your phone as a tracker. Ruhavik & WiaTag
The tracker may not work for a variety of reasons.
Most frequent:
1) The problem is on the side of the mobile operator (SIM card).
2) Lack of balance or traffic limit on the SIM card.
3) The device is in a shielded room and therefore there is no communication.
4) Incorrect or lost tracker settings (for example, the tracker has gone into sleep mode or is configured to send messages infrequently).
5) The tracker does not have enough charge and it stores data in a black box until it is connected to a power source.
In this situation, we recommend:
1. Check the traffic limit and the balance of the SIM card used in the tracker. It happens that there is money on the SIM card, for example, but the entire traffic limit has already been used up.
2. Check your tracker settings and message frequency. Sometimes the tracker goes into sleep mode and, accordingly, does not send data about the tracker's location.
3. Check the correct installation of the tracker. Perhaps it is installed in a place (in a shielded box) that does not allow it to see the satellites well.
4. Make sure that the tracker is not located in a shielded area (covered parking, tunnel, building, etc.), which also makes it difficult for the tracker to receive coordinates from the satellite.
Blog articles:
Why GPS trackers may not work
The application has a Sharing option, which is designed to share the location of your unit with others using a special link.
Using the Sharing option, you can create such links for each unit for up to 1 year. It is also possible to create a link to access multiple units.
Sharing option is only available with a paid subscription.
More details about Sharing.
Blog articles:
1. Use the Sharing option and stay in touch!
2. Updates in Ruhavik: Engine Hour Counters, Multiple Unit Sharing, and Track Tail
3. Petovik's Update: Introducing Sharing Option
To recover your password, you need to do the following:
1. When you enter the application, use the ""Forgot password?"" function, after which an email with a link to reset your password will be sent to the email associated with your account.
2. Follow the link in the email and create a new password.
3. Return to the login page and enter your username and new password.
To change your email address, you can do the following:
1. Go to the user settings by clicking on the three vertical dots in the upper right corner.
2. In the email line, click the pencil icon, a window for changing the address will open.
3. Enter your new email address and current password.
4. In the email that will be sent to your new email address, click on the link to confirm the change of email address.
There are two ways to change your password:
1) Function "Forgot password?"
1. On the account login page, click "Forgot password?", after which an email with a link to reset your password will be sent to the email associated with your account.
2. Follow the link in the email and create a new password.
3. Return to the login page and enter your username and new password.
2) Changing the password in the user settings:
1. Go to the user settings by clicking on the three vertical dots in the upper right corner.
2. In the password bar, click the pencil icon; a window for changing the password will open.
3. Enter the current password as well as the new password and repeat it.
More details about user settings.
In case you do not have access to your account and the email address to which the account is registered, write to us at support@gps-trace.com with the IMEI / ID, type (model) and manufacturer of your tracker, and we will describe the necessary steps to solve the problem.
In case your tracker was offline for some reason, it could accumulate GPS data in memory and, after reconnecting, start uploading this data into our system.
Thus, the time difference is formed:
1. time when the tracker received data from satellites;
2. the time when the data was sent to the system by the tracker.
Thus, so-called messages from the past come into the system.
In the Toolbox, such messages are grayed out. Toolbox is only available with a paid subscription.
More details about Toolbox.
The storage is designed to store data that comes from the tracker into our system.
After the entire amount of storage provided by your tariff plan is completely filled, new data from the tracker will overwrite the oldest ones. The application itself will continue to work as usual and will display the current location of the tracker.
The maximum storage period for data transmitted from the tracker is 365 days.
In the Statistics tab, the following information is available to users:
- summary mileage information;
- charts by parameters sent by the tracker;
- summary engine hours information (if the tracker sends the engine.ignition.status parameter and the user has a premium subscription);
- export events.
Statistics tab is only available with a paid subscription.
More details about statistics.
Also, the application collects data on the timeline (all information about the events of the unit: trips, parking, speeding, alarm messages, battery charge, towing, etc.) and on the history of trips (information about the track for a certain day or period of time).
Timeline tab is only available with a paid subscription.
Blog articles:
1. Mileage and Engine Hours Counters in Ruhavik
2. Exporting Data from Ruhavik: Detailed Guide
You can export data for the following sections:
- Timeline
(all information about the events of the unit: trips, parking, speeding, alarm messages, battery charge, towing, etc.).
- History
- Export events
- Toolbox
- Export geofences.
available with a paid subscription.
Blog articles:
1. Exporting Data from Ruhavik: Detailed Guide
2. Ruhavik Updates: Nautical Measure, Data Export, and Unit Grouping on the Map
The application offers Simple, Customizable and Parameter notifications.
The simple ones are notifications:
- by geofences;
- by alarm messages from your device;
- on trips;
- for towing.
The customizable ones are notifications:
- about exceeding the specified speed by the unit;
- about the battery charge;
- the need to charge the device;
- about the absence of messages from the device.
Parameter notifications allows you to receive notifications related to the parameters you choose, which are contained in the messages sent by the tracker.
You can receive notifications about fuel, battery, door open/close, alarm activation, and much more.
available with a paid subscription.
More details about notification types.
Blog articles:
Notifications: Track your vehicle with ease
Notifications can be sent in the following ways:
- in the form of push notifications;
If you have a paid subscription, the following methods are also available:
- by email to the email associated with your account;
- to the Telegram messenger;
- in the form of webhooks to your server.
More details about setting up notifications in Telegram.
Our application is free to track 1 unit.
The free package also includes the use of 1 geofence and 1 MB of storage.
With a paid subscription, users can get additional benefits, the volume and level of which depend on the chosen subscription plan:
- Up to 30 units per account
- More data storage (up to 100 MB)
- Google Maps
- Advanced notifications and additional delivery methods (email, Telegram, and webhooks)
- Up to 15 geofences of various shapes, including polygons
- Unit Tools: Toolbox and SetBox – allow you to remotely configure the operation of GPS devices, view messages from the tracker, connection logs, errors, unit edits, and all raw traffic.
- Commands Panel – GPRS commands for greater control over your devices (available from the Premium Basic plan and higher).
- Location Sharing – the ability to share the location of your vehicles with other people using a special link.
- Timeline – track all unit events for the selected day in chronological order.
- Statistics – view unit statistics, analyze data with charts, and export summary reports in various formats.
- Maintenance – monitor the condition of your vehicle and manage its maintenance using mileage and engine hours counters.
- And more.
You can subscribe via Google Play, App Store, or by paying via PayPal or Stripe directly on the website.
The subscription cost can be viewed in the Subscriptions section of the application or by clicking the Subscribe button in the upper left corner of our website.
More details on our pricing.
We really appreciate the feedback and ratings of our users because they help us develop and grow.
If you have the opportunity and a couple of minutes of time, we will be very grateful if you can rate our application:
- on Google Play;
- on App Store.
We communicate with our users via email.
- If you have any questions about working with Ruhavik, Petovik or Forguard solutions, please contact us at support@gps-trace.com.
You can also post your question on our forum.
- If you want to become a partner and use our tools to build a monitoring business, write to us at business@gurtam.space.
More details our business solutions.