Premiers pas avec la plateforme GPS-Trace
Ce guide vous accompagnera à travers les étapes pour commencer à utiliser notre plateforme.
Alors, commençons !
Regardez cette courte vidéo pour découvrir les premières étapes et les principaux avantages de notre système, vous aidant à démarrer en un rien de temps
Feuille de route de démarrage rapide
Suivez ces six étapes simples pour mettre en place et faire fonctionner votre plateforme de suivi GPS
Inscrivez-vous dans GPS-Trace Console
GPS-Trace Console est votre centre de gestion centralisé pour créer et gérer des comptes sur toutes les solutions GPS-Trace.
L'inscription est simple :
- Visitez la page d'inscription.
- Cliquez sur le bouton S'inscrire.
- Remplissez les champs requis.
- Confirmez votre email.
C'est tout ! Vous avez maintenant accès à la plateforme.
Ce que GPS-Trace Console vous offre :
-
 Créer des comptes et des unités dans n'importe quelle solution de la plateforme GPS-Trace.
-
Configurer des forfaits, gérant ainsi les fonctionnalités de l'application.
-
Personnaliser l'image de marque avec votre logo et vos couleurs.
-
Obtenez de l'aide avec l'assistant IA intégré 24h/24 et 7j/7, et la documentation
-
Utiliser l'API de la plateforme pour des intégrations avancées.
Pour les fournisseurs de services
-
 Outils de collecte de paiements (Stripe/PayPal).
-
Capacités de support technique à distance.
-
Blocage automatique des utilisateurs pour non-paiement.
-
Affichage sur la carte des revendeurs et profil affiché dans l'application client.
Activez l'essai gratuit de 30 jours
Après l'inscription, activez votre période d'essai directement dans la console de la plateforme pour explorer toutes les fonctionnalités de la plateforme gratuitement.
Ce que vous pouvez tester pendant l'essai :
-
 2 comptes avec accès à l'application Forguard (jusqu'à 30 unités chacun)
-
2 comptes avec accès à la solution Tags (jusqu'à 10 capteurs chacun)
-
Configuration de plans avec différentes fonctionnalités et limites
-
Fonctionnalités principales débloquées — accès multi-utilisateurs, personnalisation de la marque, etc.
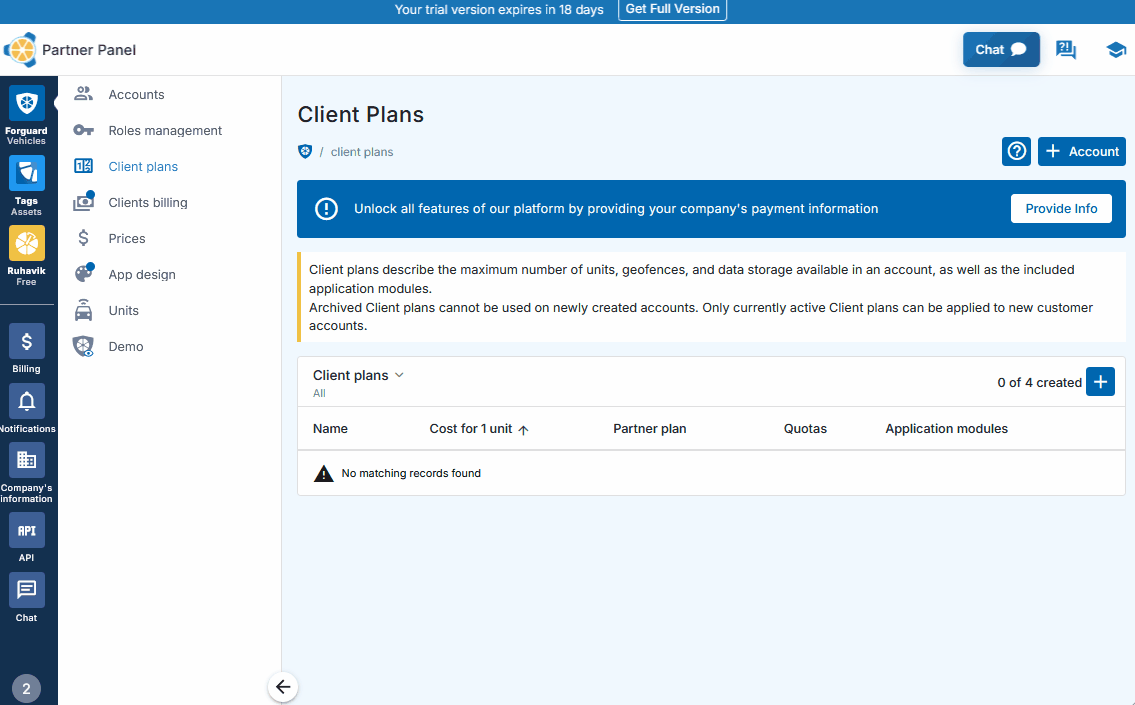
Créer un forfait
La plateforme GPS-Trace vous connecte à deux solutions de suivi : Forguard et Tags.
Avant de créer un compte avec accès à Forguard ou Tags, vous devez configurer un Forfait client - une configuration qui définit quelles fonctionnalités seront disponibles et quelles limites s'appliqueront.
Les forfaits clients sont basés sur les forfaits partenaires fournis par GPS-Trace. Vous pouvez consulter tous les forfaits partenaires disponibles et leurs tarifs ici.
Création de votre premier forfait
- Accédez à la section Forguard ou Tags dans GPS-Trace Console
- Allez dans l'onglet Forfaits clients
- Cliquez sur le bouton "+" pour créer un nouveau forfait
- Définissez les limites maximales (unités, géozones, période d'historique)
- Sélectionnez les fonctionnalités à activer
- Enregistrez votre forfait
Pour les fournisseurs de services
Les forfaits clients permettent aux fournisseurs de services de créer différents packages de services avec des fonctionnalités et des prix variés. Les revendeurs peuvent proposer des options par niveaux (Basique, Professionnel, Entreprise, etc.) à différents segments de clients et fixer leurs propres tarifs.
La marge bénéficiaire est la différence entre ce que les revendeurs facturent à leurs clients et ce qu'ils paient à GPS-Trace.
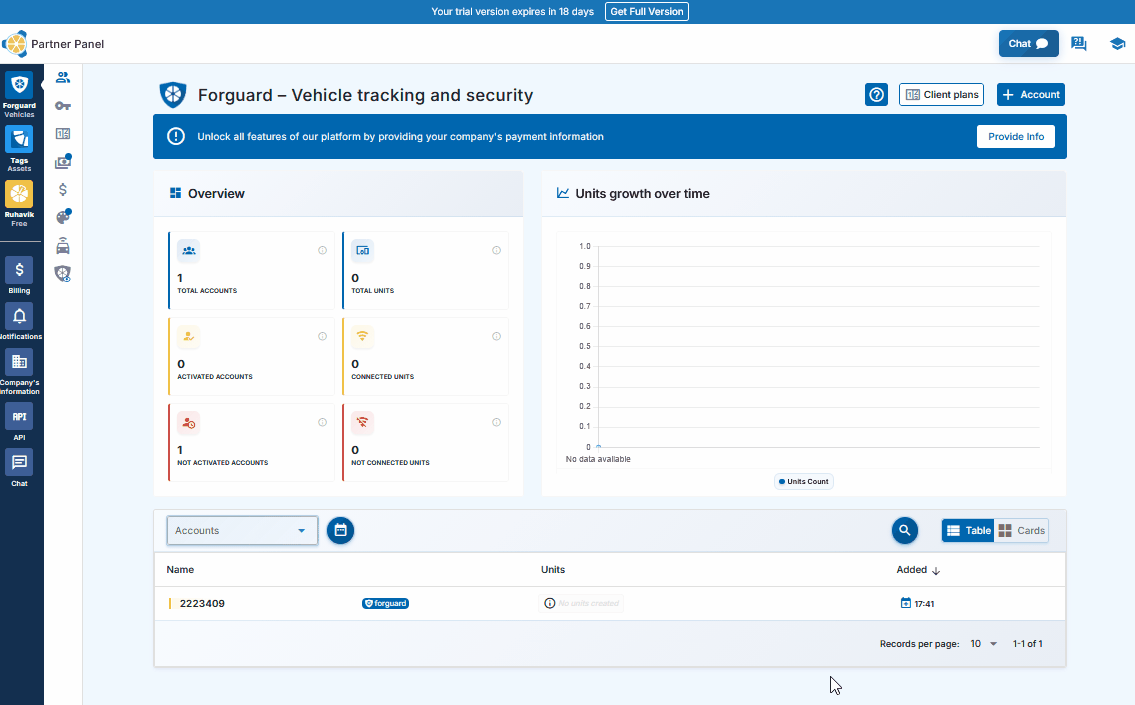
Créer un compte
Maintenant que vous avez un forfait client prêt, il est temps de créer un compte qui donnera accès à l'application (Forguard ou Tags).
Création d'un compte
- Allez dans l'onglet Forguard ou Tags dans GPS-Trace Console
- Cliquez sur le bouton bleu "+" dans la section Comptes
- Sélectionnez le forfait client précédemment créé dans le menu déroulant.
- Cliquez sur le bouton 'Enregistrer'.
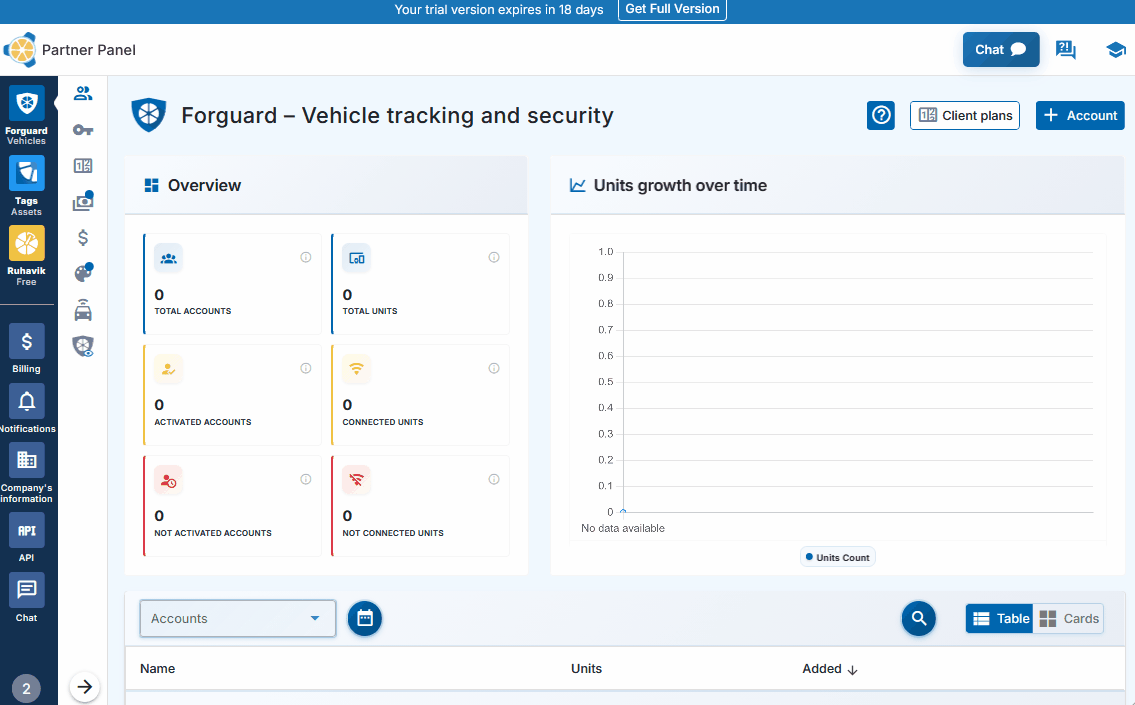
Terminé ! Le compte est créé instantanément.
Pour commencer à utiliser l'application, activez le compte en définissant les identifiants de connexion via le lien d'activation ou le code QR. Cela peut être fait par vous-même (si vous l'utilisez pour votre propre entreprise) ou partagé avec un client pour son activation.
Accès multi-utilisateurs et permissions
La plateforme prend en charge l'accès multi-utilisateurs aux applications avec gestion des permissions. Des utilisateurs supplémentaires peuvent être créés directement dans GPS-Trace Console avec des niveaux d'accès personnalisés.Deux outils aident à organiser l'accès de l'équipe :
Rôles - définissent quelles fonctionnalités les utilisateurs peuvent accéder (notifications, rapports, géozones, commandes) et quelles actions ils peuvent effectuer (voir, créer, modifier, supprimer)
Listes d'accès - contrôlent quels appareils spécifiques (unités) chaque utilisateur peut voir, utile pour séparer l'accès par équipes, régions ou types de véhicules.
Créer une unité
Les unités sont les traceurs GPS ou passerelles physiques qui collectent et transmettent les données à la plateforme. Sans unités, le compte n'aura aucun appareil à suivre. Créer des unités connecte votre matériel au système.
Création d'unités dans Forguard
- Sélectionnez le compte auquel vous souhaitez ajouter une unité
- Cliquez sur l'icône "+" dans la section Unités
- Sélectionnez le modèle de votre appareil GPS (traceur) dans la liste.
- Entrez les détails de l'appareil (IMEI, mot de passe si requis)
- Cliquez sur le bouton 'Enregistrer'
Si votre appareil est correctement configuré et transmet des données, vous le verrez en ligne en quelques minutes.
Passerelles, capteurs et actifs dans Tags
Tags fonctionne avec 3 types d'entités :
-
Passerelles — traceurs GPS qui détectent les capteurs BLE et transmettent les données
-
Capteurs — sources de données pouvant être liées à un actif (balises BLE, capteurs filaires ou paramètres de passerelles).
-
Actifs — objets physiques ayant de la valeur pour l'utilisateur et nécessitant un suivi (conteneur, remorque, outil, équipement).
La création de passerelles suit le même processus que la création d'unités Forguard (étapes ci-dessus).
Création de capteurs dans Tags
- Connectez-vous à Tags
- Accédez à la page de la passerelle pour voir les appareils BLE détectés
- Cliquez sur « + » à côté des appareils non liés pour créer des capteurs
- Ou créez des capteurs à partir des paramètres de la passerelle via l'onglet Données de télémétrie
Signer le contrat d'offre
Lorsque vous êtes prêt à continuer à utiliser la plateforme au-delà de la période d'essai, signez le contrat d'offre.
- Allez dans la section Informations de paiement de l'entreprise
- Remplissez les détails requis et téléchargez les documents de vérification (certificat d'enregistrement de la société ou document d'enregistrement de l'entité commerciale)
- Soumettez pour vérification
- Une fois approuvé, lisez et acceptez le contrat d'offre
C'est tout ! Vous êtes maintenant un utilisateur pleinement autorisé avec un accès complet à la plateforme.
Pour les fournisseurs de services
Après avoir signé le contrat d'offre et complété la vérification, les fournisseurs de services débloquent des outils commerciaux avancés :
-
Facturation client - Intégration PayPal et Stripe avec génération de liens de paiement et facturation automatisée des clients
-
Blocage automatique des comptes - possibilité de définir une date de blocage pour les clients
-
Personnalisation de marque avancée - propre domaine (CNAME) et nom d'application
-
Unités brouillon - pré-création d'unités sans frais de facturation jusqu'à l'attribution aux comptes clients
Fonctionnalités et avantages de la plateforme
Ce qui distingue la plateforme GPS-Trace